

DIAMOND CUTTING
Though typically not as time intensive as ceramic polishing refurbishment, diamond cut refurbishment still takes longer to complete than standard powder coating refurbishment. (Please see our FAQ page for more details)
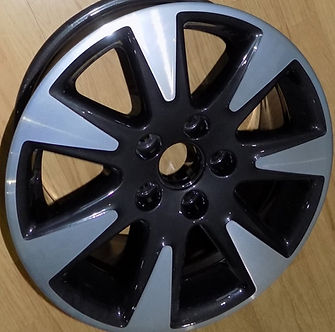
The diamond cutting process involves the use of a diamond cutting wheel lathe to remove, from specific parts of a wheel, a very thin layer of the wheel itself. The lathe cuts (or machines) off a very thin layer of the wheel to produce a very shiny CD-like finish. Our diamond cutting wheel lathes can carry out this process on wheels that are between 14 and 30 inches in diameter.
As a thin layer of the wheel is removed each time the process is carried out, a wheel can only be diamond cut a finite number of times.
The Diamond Cut Refurb Process:
Step 2 –
Tyres, centre caps, balance weights, valves and TPMS sensors (if applicable) are removed from the wheels.
Step 3 –
Current paintwork/finish, all dirt and grime stripped from the wheels via chemical dipping.
Step 4 –
Wheels are shot blasted to further clean them and to prepare the surface of the wheels.
Step 5 –
Any structural wheel repairs (if required) are carried out - i.e. wheel straightening/dent removal, welding of cracks and gouges etc.
Step 6 –
Kerb damage (if any) is removed from the wheels and final surface preparation is carried out.
Step 7 –
Wheels are pre-heated and a powder primer is then applied.
Step 8 –
Base coat colour applied to wheels and then cured.
Step 9 –
Wheels undergo the diamond cutting process in our diamond cutting wheel lathe.
Step 10 –
Powder coat lacquer applied to wheels and then cured.
Step 11 –
Once cured, the wheels are left to cool down before further handling.
Step 12 –
Valves, TPMS sensors (if applicable) and tyres fitted to the refurbished wheels.
The wheels are then balanced.
Step 13 –
The refurbished wheels are finally fitted back onto the vehicle and centre caps are re-fitted.
Step 1 –
Wheels are removed from the vehicle.

%20no%20wheel.png)
